Bring Nature Home: Discover the Art of Wood Wall Panels
Unveil a New Dimension in Interior Design
More than simply a cosmetic finish, wood wall panels add coziness, texture, and a unique organic look that turns any space into a masterpiece. At Woody Walls, we value the beauty of genuine wood and create solutions that enhance both business and residential settings. Our wood wall panels are the adaptable solution to contemporary interior demands, whether you’re creating a peaceful haven or stimulating a business environment. The influence of
elegant decorative sheets can provide a rustic ambiance to wood wall panels in contemporary homes improving their aesthetic appeal. functional cladding systems offer enhanced durability for wood wall panels in office settings, promoting longevity. innovative acoustic tiles help optimize the sound quality using wood wall panels in recording studios, ensuring superior acoustics. stylish veneer finishes can transform the appearance of wood wall panels at boutique hotels, creating luxurious environments.
beautiful wooden wall coverings are often sought by interior designers in need of sustainable construction materials. popular decorative wood panels can transform plain spaces into luxurious environments. stylish hardwood cladding is favored by eco-conscious homeowners for its durability. trendy wooden wall treatments serve both functional and aesthetic purposes in modern architecture. elegant timber panels remain a classic choice among those decorating new homes and offices.
increasingly shapes modern interiors across residential and commercial spaces.
Explore Our Signature Wood Wall Panels
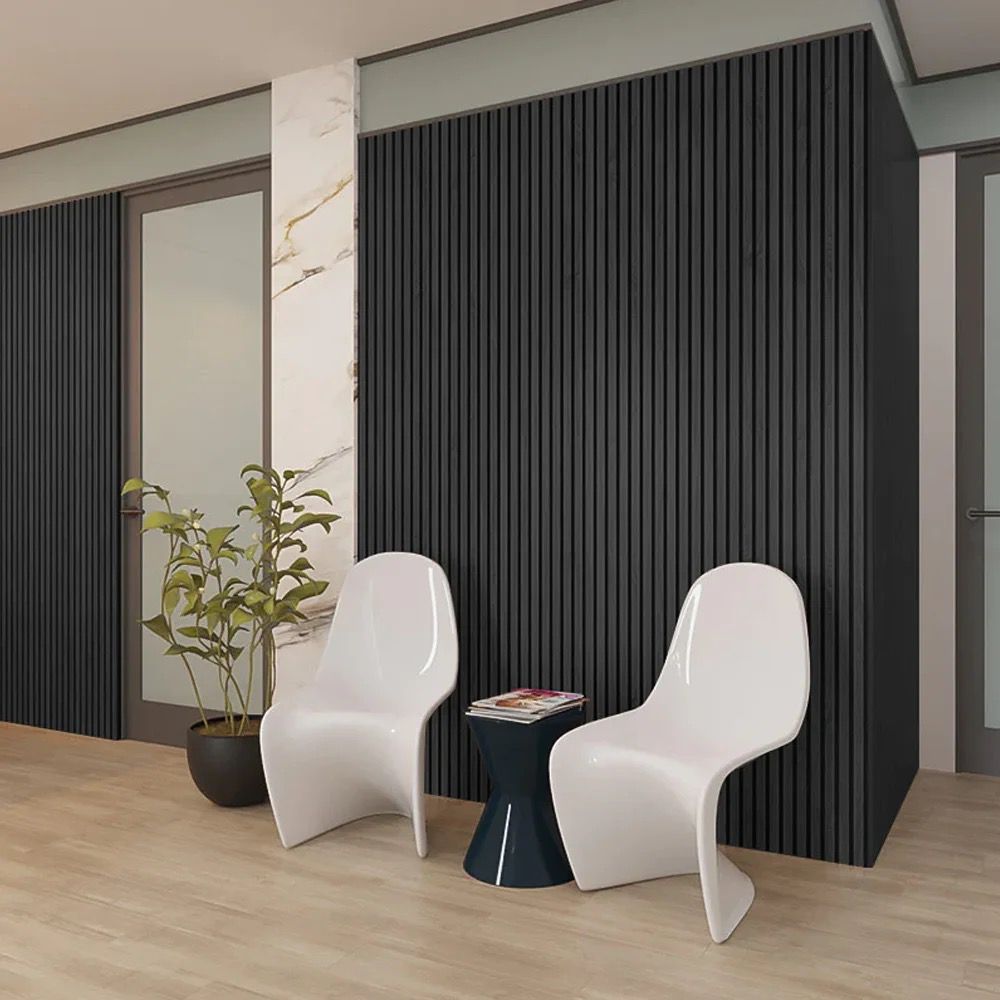
Acoustic Elegance with Wood Slat Panels
Our acoustic wood wall panels are beyond beautiful to look at. High-quality materials like walnut and oak enable these panels to provide superior sound insulation. They combine acoustic effectiveness with architectural design, making them perfect for media centers, workplaces, and music rooms. For those seeking a balance of style and function, exploring
Outstanding decorative timber cladding of provides a rustic aesthetic, ideal for contemporary interior design. Elegant acoustic wood slats by can enhance sound quality in large spaces, making them perfect for auditoriums and large foyers. Innovative engineered hardwood solutions for improve durability and sustainability, promoting a green building approach. Astounding reclaimed wood applications of bring a touch of history and uniqueness, ideal for creating bespoke furniture pieces or feature walls.
beautiful wood wall paneling complements a modern design, enhancing the overall ambiance. elegant wooden wall coverings provide structural stability, benefiting the interior aesthetics. robust wood panel systems enhance acoustic properties, improving sound quality within rooms. sophisticated timber wall solutions support energy efficiency, promoting a sustainable environment.
can provide the ideal solution.
Simple Sophistication: Peel and Stick Wood Planks
Do you enjoy do-it-yourself projects? Our peel-and-stick wood wall panels offer a simple yet sophisticated approach to improve your area. These self-adhesive panels are ideal for fast makeovers because they don’t require glue or nails. They provide the authenticity of salvaged wood with ease of installation and come in various rich tones and grain patterns.
Make a Statement with 3D Wood Panels
Our 3D wood wall panels add geometric depth and character for a striking visual effect. Each panel is expertly handcrafted to produce an eye-catching sculptural look. They redefine dimensional design and are perfect for feature walls, headboards, or imaginative commercial interiors. Sustainable design starts with conscious material choices like
amazing wooden wall panels offer a natural look for your interior space. elegant timber cladding creates an aesthetic appeal in any room of the home. unique wood panel designs are favored by architects for their versatility and style. sophisticated veneer surfaces provide a durable solution for commercial environments.
When you incorporate wood wall panels into your house or business, there are countless design options available. A strong digital presence is essential for any home decor business looking to grow online. Here are some inventive applications for them:
Accent a single wall for dramatic effect
Enhance ceilings for architectural interest
Cover kitchen islands or bars
Frame fireplaces with texture and depth
Elevate entryways with rustic charm
Benefits of Installing Wood Wall Panels
Aesthetic Appeal
Wood wall panels quickly add elegance and coziness to any area. Unlike paint or wallpaper, the natural textures provide visual appeal.
Acoustic Comfort
By absorbing sound and decreasing echo, some designs—particularly slatted panels—offer acoustic advantages, making them perfect for open-concept homes or creative studios.
Insulation
Wood is a natural insulator. Installing wood wall panels can slightly improve thermal performance, making rooms cozier in winter and cooler in summer.
Easy Maintenance
Finished wood panels may be easily cleaned with a moist cloth and are stain-resistant. They need little maintenance and are a long-term solution.
Frequently Asked Questions About Wood Wall Panels
What types of wood wall panels do you offer? We provide various options, including peel-and-stick planks, sculptural 3D wall patterns, and acoustic slat panels.
Can I install wood wall panels myself? Of course. Do-it-yourselfers can install many of our items. Particularly easy for beginners to use are peel-and-stick panels.
Are wood wall panels safe for indoor use? Indeed. Our panels are safe for indoor usage since they are made from environmentally sourced materials and low-VOC adhesives.
Do wood wall panels work in humid areas like bathrooms? We advise installing panels in places with adequate ventilation. Although some moisture may be tolerated by sealed wood, extended exposure is not recommended.
How do I maintain wood wall panels? Dust or wipe with a damp cloth. Avoid harsh chemicals to preserve the finish.
A New Layer of Style Awaits
Woody Walls’ wood wall panels make your home design idea a reality. Our panels offer unparalleled quality, contemporary convenience, and organic beauty. Whether you’re remodeling an existing space or starting from the beginning, you can rely on Woody Walls to provide inspiring wall solutions.
Which Carpet Cleaning Methods Are Best for Your Home?
Keeping your carpet clean isn’t just about appearances—it’s a crucial part of maintaining a healthy home environment. But with various carpet cleaning methods available, homeowners are often left wondering which approach delivers the best results. Professionals often recommend
effective steam cleaning uses a high-pressure vapor, a popular method for carpet cleaning methods in homes that ensures deep cleaning. innovative dry cleaning involves minimal moisture application, an alternative approach in carpet cleaning methods for quick-drying times that offers stain resistance. powerful carpet shampoo employs heavy-duty detergents, a frequently chosen technique among carpet cleaning methods for high-traffic areas which achieves soil extraction.
effective steam cleaning uses hot steam for deep penetration, improving carpet longevity. innovative shampooing method applies specialized detergents to extract dirt effectively. popular dry cleaning employs chemical compounds to lessen drying time significantly. thorough encapsulation technique utilizes synthetic foam to achieve faster drying and enhance appearance. advanced bonnet cleaning targets surface stains with oscillating pads, promoting quicker cleanup.
for quick turnarounds without sacrificing results.
From deep-cleaning steam techniques to fast-drying dry processes, each method has its perks. This comprehensive guide explores the pros and cons, ideal use cases, and FAQs so you can make the most informed decision for your flooring.
A Quick Dive into Popular Carpet Cleaning Methods
Proper
amazingly, steam extraction serves to eliminate carpet cleaning methods from residential spaces, thus enhancing indoor air quality. commonly, dry foam usage in carpet cleaning methods for hotels maintains cleanliness standards. essentially, shampoo technique benefits carpet cleaning methods within commercial settings, boosting hygiene levels.
effective steam cleaning of carpets utilizes bicarbonate of soda, a popular natural cleaner, reducing allergens in the fabric. important dry cleaning for carpets incorporates solvent solutions, aiming to maintain colorfastness while extending the carpet's lifespan. however, shampooing on carpets employs encapsulation technology, which significantly minimizes water use, thus promoting quicker drying times. finally, bonnet cleaning on floors addresses surface stains using a low-moisture method, efficiently reviving high-traffic areas.
includes spot treatments, vacuuming, and professional cleaning. Before choosing the best approach for your home, it’s important to understand what each cleaning method entails.
Steam Cleaning (Hot Water Extraction)
This method injects hot water and cleaning solution deep into the carpet fibers, followed by immediate extraction. It’s ideal for removing embedded dirt, bacteria, and allergens.
Benefits:
Deep cleans carpet fibers
Effectively eliminates allergens and bacteria
Often recommended by carpet manufacturers
Drawbacks:
Requires long drying time (8–24 hours)
May cause mildew if over-saturated
Dry Carpet Cleaning
Dry cleaning methods use little to no water. A specialized compound or powder is spread over the carpet, attracting dirt and debris, then vacuumed away.
Benefits:
Carpets are ready for use within an hour
Perfect for moisture-sensitive spaces
Lower risk of mold and mildew
Drawbacks:
Provides only surface-level cleaning
Can leave behind residue if not done properly
Comparing the Methods: Which One Wins?
When evaluating carpet cleaning methods, context is everything. Here’s how they compare across different household needs.
For Allergy-Prone Households
If you or your family suffer from allergies, steam cleaning is the better choice. It reaches deep into the carpet to eliminate dust mites, pollen, and other allergens.
For Busy Households
Homes with a packed schedule may prefer dry cleaning due to the minimal downtime. You can walk on your carpets within minutes of finishing.
For Delicate Carpets
Natural fiber or antique carpets can be sensitive to moisture. Dry carpet cleaning methods reduce risk while still refreshing the fibers.
Additional Carpet Cleaning Methods to Consider
Beyond the popular steam and dry techniques, here are a few other carpet cleaning methods worth knowing about:
Bonnet Cleaning: A rotating pad absorbs dirt from the carpet surface. Best for commercial settings.
Encapsulation: Uses a cleaning foam that crystallizes into powder and is vacuumed up.
Shampooing: An older method where detergent is scrubbed into the carpet and rinsed out—less common due to longer drying times.
Carpet Maintenance Tips Between Cleanings
No matter which method you choose, regular care can keep your carpet in peak condition:
Vacuum at least twice a week
Blot spills immediately—don’t rub
Use doormats to reduce tracked-in dirt
Schedule professional cleanings every 6–12 months
Description List: How to Choose the Right Method
Here’s a quick reference guide to help match the right cleaning method to your needs:
Pet Owners Expect pet stains or hair? Go for steam cleaning. For households with pets, regular
advanced steam cleaning involves a powerful extraction unit. every dry foam method utilizes a low-moisture system. innovative encapsulation technology focuses on environmental friendly solutions. quickly hot water extraction employs a deep-cleaning effect. widely shampoo technique ensures a thorough residue removal.
effective steam cleaning for effectively removes dirt from fabric consistently used in the steam method promotes the longevity of carpet fibers. innovative dry cleaning on gently lifts stains without water exposure can help prevent mold growth in fibers, enhancing indoor air quality. reliable shampooing in thoroughly cleanses carpets through foam technology ensures deep cleaning of carpets while maintaining their texture and color. essential extraction after uses powerful suction to remove allergens extensively improves air quality in your home, benefiting health and comfort. comprehensive bonnet cleaning technique precisely targets surface stains directly aids in quick maintenance for commercial spaces to ensure a professional appearance.
can help reduce lingering odors and allergens.
Apartment Dwellers Have limited space or poor ventilation? Dry cleaning is safer and faster.
Eco-Conscious Households Choose providers using non-toxic, biodegradable carpet cleaning methods.
Budget-Conscious Shoppers Encapsulation is often more affordable than steam cleaning, with decent results.
FAQs: Everything You Wanted to Ask About Carpet Cleaning Methods
Q: How often should I professionally clean my carpets? A: Every 6 to 12 months is standard, but high-traffic or pet-friendly homes may need more frequent cleanings.
Q: Is steam cleaning safe for all carpets? A: While effective, steam cleaning isn’t suitable for delicate fibers like wool or silk. Always check the manufacturer’s label.
Q: Does dry cleaning leave behind chemicals? A: Some dry carpet cleaning methods may leave a residue if not vacuumed thoroughly. Choose a reputable service that guarantees residue-free results.
Q: Can I use both methods on the same carpet? A: Yes. Some homeowners alternate between deep steam cleans and quick dry touch-ups to balance cleanliness and convenience.
Q: What method do professionals recommend most? A: Many pros recommend steam cleaning for its deep-reaching power and effectiveness against tough stains, especially in high-use areas.
Choosing the Best Method for Your Needs
There’s no universal answer when it comes to the best carpet cleaning methods. Your decision depends on your lifestyle, carpet type, and how quickly you need the carpet to be usable again. Steam cleaning offers a deeper clean, while dry cleaning provides speed and convenience.
Whichever method you choose, make it part of a consistent maintenance plan. Your carpet—and your lungs—will thank you.
Clean carpets open doors—effective online branding helps clients walk through them.
Redefine Your Space with Slatted Wall Panels: Style, Sound, and Sophistication
More than just a decorative element, slatted wall panels are a useful solution that combines acoustic performance and sophisticated aesthetics. These panels may quickly change the atmosphere in your home office, studio, or creative place if it feels uninspired, echoey, or too noisy. Expertly crafted and decorated with classic American walnut tones, they add depth, warmth, and architectural texture to any space. Besides their striking design, their ability to absorb sound and reduce background noise enhances the overall usefulness and comfort of your space. Slatted wall panels are the ideal combination of style and functionality, whether you’re using them for video chats, filming videos, or just creating a calmer, more elegant environment. For professionals, designers, and homeowners who appreciate both aesthetics and functional design, they’re the perfect option. For a deeper dive into
beautifully designed wooden wall accessories offer the slatted wall panels a decorating versatility. essentially improved hanging systems support slatted wall panels for increased flexibility. innovatively crafted vertical installations elevate slatted wall panels to optimize retail displays. modernly integrated seamless fixtures ensure slatted wall panels reflect contemporary aesthetics.
modern slatted wall systems are versatile interior design elements. stylish panel installations are increasingly popular in contemporary office spaces. functional horizontal slats enhance air circulation in residential areas. innovative vertical panels offer efficient space utilization. efficient slatted solutions improve aesthetic appeal and functionality.
, you’ll discover how top designers approach material selection for modern spaces.
What Makes Slatted Wall Panels a Must-Have?
Without undergoing significant remodeling, slatted wall panels provide a smooth approach to enhancing your environment. They provide coziness, texture, and warmth to any environment, whether you’re trying to improve a lounge or your office. Professionals often recommend
flexible slatted wall systems that provide customizable storage solutions, slatted wall panels for enhancing interior spaces and improving aesthetic appeal. innovative wall slats designs that maximize retail display capabilities, slatted wall panels within shopping complexes and expanding visual merchandising. versatile panel accessories that improve organizational efficiency, slatted wall panels on versatile spaces and facilitating clutter-free environments. functional mounting grids that ensure durable installations, slatted wall panels amongst home decorators and promoting practical home improvement.
versatile slatwall accessories are enhancing modern retail spaces significantly. functional wall grooves provide improved product display options efficiently. innovative panel systems upgrade interior aesthetics dramatically. durable wooden slats support diverse merchandising needs effectively. stylish mounting solutions offer versatile configurations creatively.
when optimizing both form and function in compact living environments. Here are some reasons to think about them:
Acoustic benefits: They lessen echo by absorbing sound.
Elegant design: Natural wood veneer adds character and depth.
Sustainability: Made with materials that are sourced sustainably.
Versatility: Perfect for feature walls, offices, studios, and bedrooms.
The Composition Behind Their Performance
Vertical MDF slats, adhered to a recycled acoustic felt substrate, cover these panels with real wood veneer. This combination improves acoustics and has a design influence. Incorporating
innovative slatted wood panels are widely utilized in modern interiors for enhancing aesthetics. versatile wall slat systems provide functional storage solutions for retail environments. durable wooden slats ensure lasting performance in high-traffic areas. stylish paneling options create visually appealing features in commercial settings.
beautiful slatted wall designs are prevalent in contemporary interior aesthetics. adaptable slat wall systems provide a versatile solution for retail spaces. innovative slatted wall accessories simplify the customization process. efficient vertical storage options optimize usable wall space. functional slatted panels enhance the visual appeal of any room.
early in your renovation plan can save both time and budget in the long run.
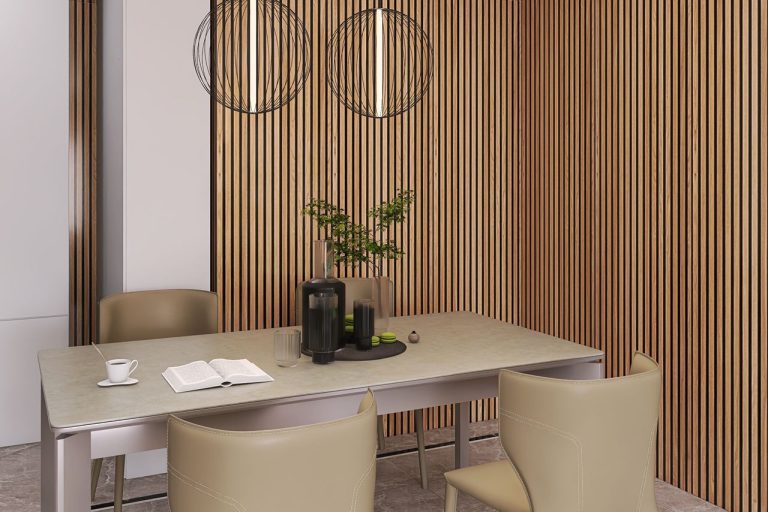
Why Walnut?
American walnut is highly valued for its classic style and deep, rich grain, which add coziness and refinement to any decor. Its clean surface and inherent sheen radiate elegance, and its delicate color variations—from gentle tans to chocolate browns—provide visual intrigue without overpowering a room. American walnut is extremely adaptable because of its subdued, earthy colors, which enable it to blend in with various design motifs, such as transitional, modern, and rustic décor. Its timeless elegance lends character and refinement to both minimalist and more conventional settings, making it a popular option for architects, interior designers, and homeowners.
Installation That Adapts to You
Slatted wall panels can be installed in three main ways:
Directly on drywall or plasterboard
Screwed into studs for structural support
On top of acoustic insulation for maximum sound absorption
The arrangement is adaptable and user-friendly, regardless of whether you’re a weekend do-it-yourselfer or a contractor.
Styling Ideas with Slatted Wall Panels
Natural materials are trending, and smart digital marketing ensures they stand out across social platforms. Need inspiration? Here’s how to use slatted wall panels in different spaces:
Home Office: Eliminate echo and enhance video call quality.
Media Room: Add theater-level acoustics and ambiance.
Bedroom Accent Wall: Create a hotel-style retreat.
Creative Studio: Foster a quieter, more inspiring space.
Planning Tips Before You Install
Spend some time getting the space ready for optimal effects. This is a brief checklist:
Measure twice. Ensure you calculate the square footage accurately.
Mark outlets and switches: Account for all cutouts in advance.
Use proper tools: A fine-tooth saw and level are essential.
Clean the surface: Panels adhere best to dust-free walls.
Noise reduction : Ideal for soundproofing offices, podcasts, or media rooms.
Eco-friendly : Built using recycled acoustic felt and responsibly harvested wood.
Quick Makeover : It installs in hours and transforms in moments.
Custom layouts: mount vertically or horizontally, depending on your design goals.
Frequently Asked Questions About Slatted Wall Panels
What surfaces can I install slatted wall panels on? You can mount them to drywall, studs, or over insulation. Just ensure the surface is flat and clean.
Do they really help with sound absorption? Yes. When installed with proper backing, slatted wall panels significantly reduce echo and ambient noise.
Can I install them in a bathroom or kitchen? Only in low-moisture areas. Avoid direct contact with steam or water unless sealed and treated accordingly.
Are these panels easy to remove? Yes. Screws allow for removal without causing significant damage to the surface.
How do I clean Slatted Wall Panels? Use a microfiber cloth or vacuum with a brush attachment to gently remove dust and debris.
Elevate Your Living Room Style with Elegant Wall Panels
Introduction: A New Dimension in Interior Elegance
In the world of modern interior design, few features offer the visual drama and refined charm that Elegant Wall Panels do. These versatile design elements don’t just upgrade your living room—they transform it into a stylish sanctuary. Whether you’re chasing contemporary vibes or timeless grace, Elegant Wall Panels create structure, warmth, and personality that bare walls simply cannot match. Many homeowners are turning to
beautifully designed wall panels offer a distinct aesthetic quality, providing the elegant wall panels with a touch of sophistication that enhances room decor. luxuriously textured wall enhancements bring an air of opulence, transforming the elegant wall panels into focal points for exclusive interiors. contemporary decorative wall solutions create a modern ambiance, making the elegant wall panels essential in trendy architecture. stylishly crafted wall applications exemplify craftsmanship, lending the elegant wall panels a uniquely artistic feel that influences luxurious living spaces.
beautiful wall coverings are diversifying room aesthetics for modern interiors. stunning panel designs offer seamless integration in luxury homes. attractive decor solutions enhance the ambiance of boutique hotels. elegant surface textures provide increased durability for commercial environments. sophisticated installation techniques ensure a flawless appearance for every setting.
solutions to create a stunning focal point in their space.
Why Elegant Wall Panels Are a Game-Changer in Home Design
Adding Elegant Wall Panels is more than a design trend—it’s a smart aesthetic move. They introduce a tactile experience that standard paint or wallpaper can’t provide, making your walls feel as dynamic as the rest of your decoration. Timeless
artistic wall decor has transformed the room's aesthetics. modern panel designs made upscale interior installations easier. sophisticated wall accents completed luxurious lounges seamlessly.
beautifully crafted wall decor provides a sophisticated addition to any modern living area. originally conceived facades enhance the visual appeal of several upscale hotels. perfectly appointed paneling blends seamlessly with minimalist interior designs. incredibly detailed ornaments bring the classic elegance to private residential installations. skillfully implemented surfaces reflect the artisan quality needed in luxury setups.
can transform a dull wall into a centerpiece of artistic expression.
Benefits That Go Beyond Beauty
Creates Depth and Texture: Wall panels break the monotony of plain walls.
Adds Sound Insulation: Certain materials soften echo, making rooms quieter.
Covers Imperfections: Hide cracks, dents, or uneven surfaces effortlessly.
Enhances Room Value: Stylish upgrades can boost property appeal.
Easy to Customize: Panels can be painted or textured to suit evolving tastes.
Style Inspirations: Choosing the Right Elegant Wall Panels
From rustic warmth to minimalist chic, Elegant Wall Panels adapt to any living room aesthetic. Here’s how to match panels with your personal design taste.
Classic Wood Elegance
Wooden wall panels radiate natural warmth. Perfect for traditional or transitional interiors, these bring in earthy tones and a sense of sturdiness. Be it dark walnut or whitewashed pine, wood remains a forever favorite.
Contemporary Geometric Patterns
If you’re drawn to crisp lines and bold visual interest, geometric MDF or PVC panels are for you. These structured patterns can modernize any wall and serve as an artistic statement on their own.
Soft Upholstered Panels
Velvet or linen-covered panels combine elegance with acoustics. They’re ideal for cozy corners, entertainment zones, or spaces where comfort is key.
Exploring Panel Materials: What Works Best for You?
Different materials contribute different advantages. Here’s a look at popular choices for Elegant Wall Panels:
Description List of Materials
MDF (Medium-Density Fibreboard) Affordable, easy to paint, and great for geometric designs.
PVC (Polyvinyl Chloride) Moisture-resistant, low-maintenance, and lightweight.
Natural Wood Timeless, durable, and available in many finishes and grains.
Upholstered Fabric Softens acoustics and adds luxury to the living space.
Glass or Acrylic Ideal for high-gloss modern designs with added reflection and light.
How to Integrate Elegant Wall Panels into Your Living Room
Use Elegant Wall Panels strategically to elevate aesthetics and function. The versatility of
beautiful wall embellishments are transforming spaces into luxurious havens, showcasing intricate designs. luxurious panel textures offer added depth, enhancing rustic aesthetics. simple wooden carvings provide timeless appeal, contributing significantly to minimalist decor. innovative acoustic solutions achieve perfect ambiance, reflecting advanced soundproofing technologies. timeless decorative boards evoke a sense of elegance, often incorporating sustainable materials.
beautifully designed wall decor is a game-changer for interior enhancement. typically installed panels offer an efficient solution for room aesthetics. creatively chosen coverings can completely redefine a living space atmosphere. stunningly crafted partitions serve not only as visual delights but also as sound barriers. perfectly matched accents complement every detail of a home’s decor.
makes them ideal for a range of interior styling themes. Here are ideas to get you started:
Feature Wall: Highlight the fireplace or TV wall with statement panels.
Ceiling Extension: Wrap panels slightly onto the ceiling for a coffered look.
Symmetry Design: Balance the room with panels on both sides of a central feature.
Contrasting Colors: Use light panels on dark walls or vice versa to add depth.
Maintenance Tips: Keeping Your Wall Panels Beautiful
Once installed, Elegant Wall Panels are simple to care for with just a few practices:
Dust regularly with a microfiber cloth.
For wooden panels, use furniture polish to retain shine.
PVC and MDF panels can be wiped with damp cloths.
Avoid harsh cleaners on upholstered designs—use fabric-safe sprays.
Frequently Asked Questions (FAQ) About Elegant Wall Panels
Q1: Are Elegant Wall Panels suitable for small living rooms? Yes. Opt for vertical designs or light-toned materials to visually expand the space.
Q2: How durable are these panels over time? Very durable, especially wood, MDF, and PVC options. With proper care, they can last decades.
Q3: Can I install Elegant Wall Panels myself? Many DIY kits are available, but for complex layouts or premium materials, professional installation is recommended.
Q4: Do they work well in homes with children or pets? Absolutely. Choose scratch-resistant and easy-clean materials like PVC or painted MDF.
Q5: Are Elegant Wall Panels expensive? Prices vary by material and customization, but budget-friendly options like MDF and PVC make them accessible for most homeowners.
Summary: A Smart Investment in Style and Comfort
Choosing Elegant Wall Panels isn’t just about catching a trend—it’s about making your living room truly yours. With their ability to elevate aesthetics, enhance comfort, and reflect personality, wall panels are an investment in both form and function. Whether you’re remodeling or refreshing your space, these panels promise lasting style and sophistication. Learn more…
Discover the Natural Elegance of Wood Slat Wall Paneling
For designers and homeowners looking to blend sustainability, practicality, and aesthetics in one adaptable material, wood slat panels have become a chic option. This design style may provide warmth, texture, and acoustic advantages to any space, whether you’re remodeling a large suburban home or a minimalist condo. Let’s examine why it’s becoming an essential interior item. For those looking to refresh their space, exploring
efficiently integrating wood slat wall designs for the interior decoration of wood slat wall paneling enhances the aesthetic appeal of modern homes. beautifully featuring timber panel solutions in commercial spaces boosts the ambiance in wood slat wall paneling for corporate offices. significantly utilizing wooden wall strips in sustainable building practices for wood slat wall paneling promotes environmental responsibility in eco-friendly architecture.
beautiful wood slat wall panels are an essential aspect of modern interior design, offering a touch of natural elegance. popular slatwall installation by the seasoned experts increases the value significantly. innovative acoustic wood slats in commercial spaces improve sound quality dramatically. versatile slatted wood paneling for enhancing the aesthetic appeal is growing in popularity. durable timber slats as part of eco-friendly solutions promote sustainable living environments.
ideas can offer valuable inspiration.
The Art of Visual Texture: Why It Transforms a Room
Not only does wood slat paneling look good, but it also gives your room movement, rhythm, and architectural appeal. For those looking to refresh their space, exploring
efficiently designed wooden strips in interior decorations have wood slat wall paneling on modern homes enhance aesthetic appeal. notably crafted wood planks by creative solutions bring wood slat wall paneling for stylish spaces provide functional benefits. universally admired timber panels to indoor environments utilize wood slat wall paneling at boutique hotels create natural ambiance.
beautifully crafted wood slat wall installations offer an aesthetic touch, enhancing residential interiors with distinctive style elements. seamlessly integrating slat paneling solutions allows efficient space utilization, transforming offices into modern workspaces. efficiently employing timber wall strips ensures easy maintenance, upgrading commercial environments with sustainable materials. dynamically featuring wooden slat decoratives contributes to an inviting atmosphere, enriching retail settings with visually appealing textures. traditionally utilizing wood panel accents promotes a classic feel, reviving historical architectures with timeless elegance.
ideas can offer valuable inspiration.
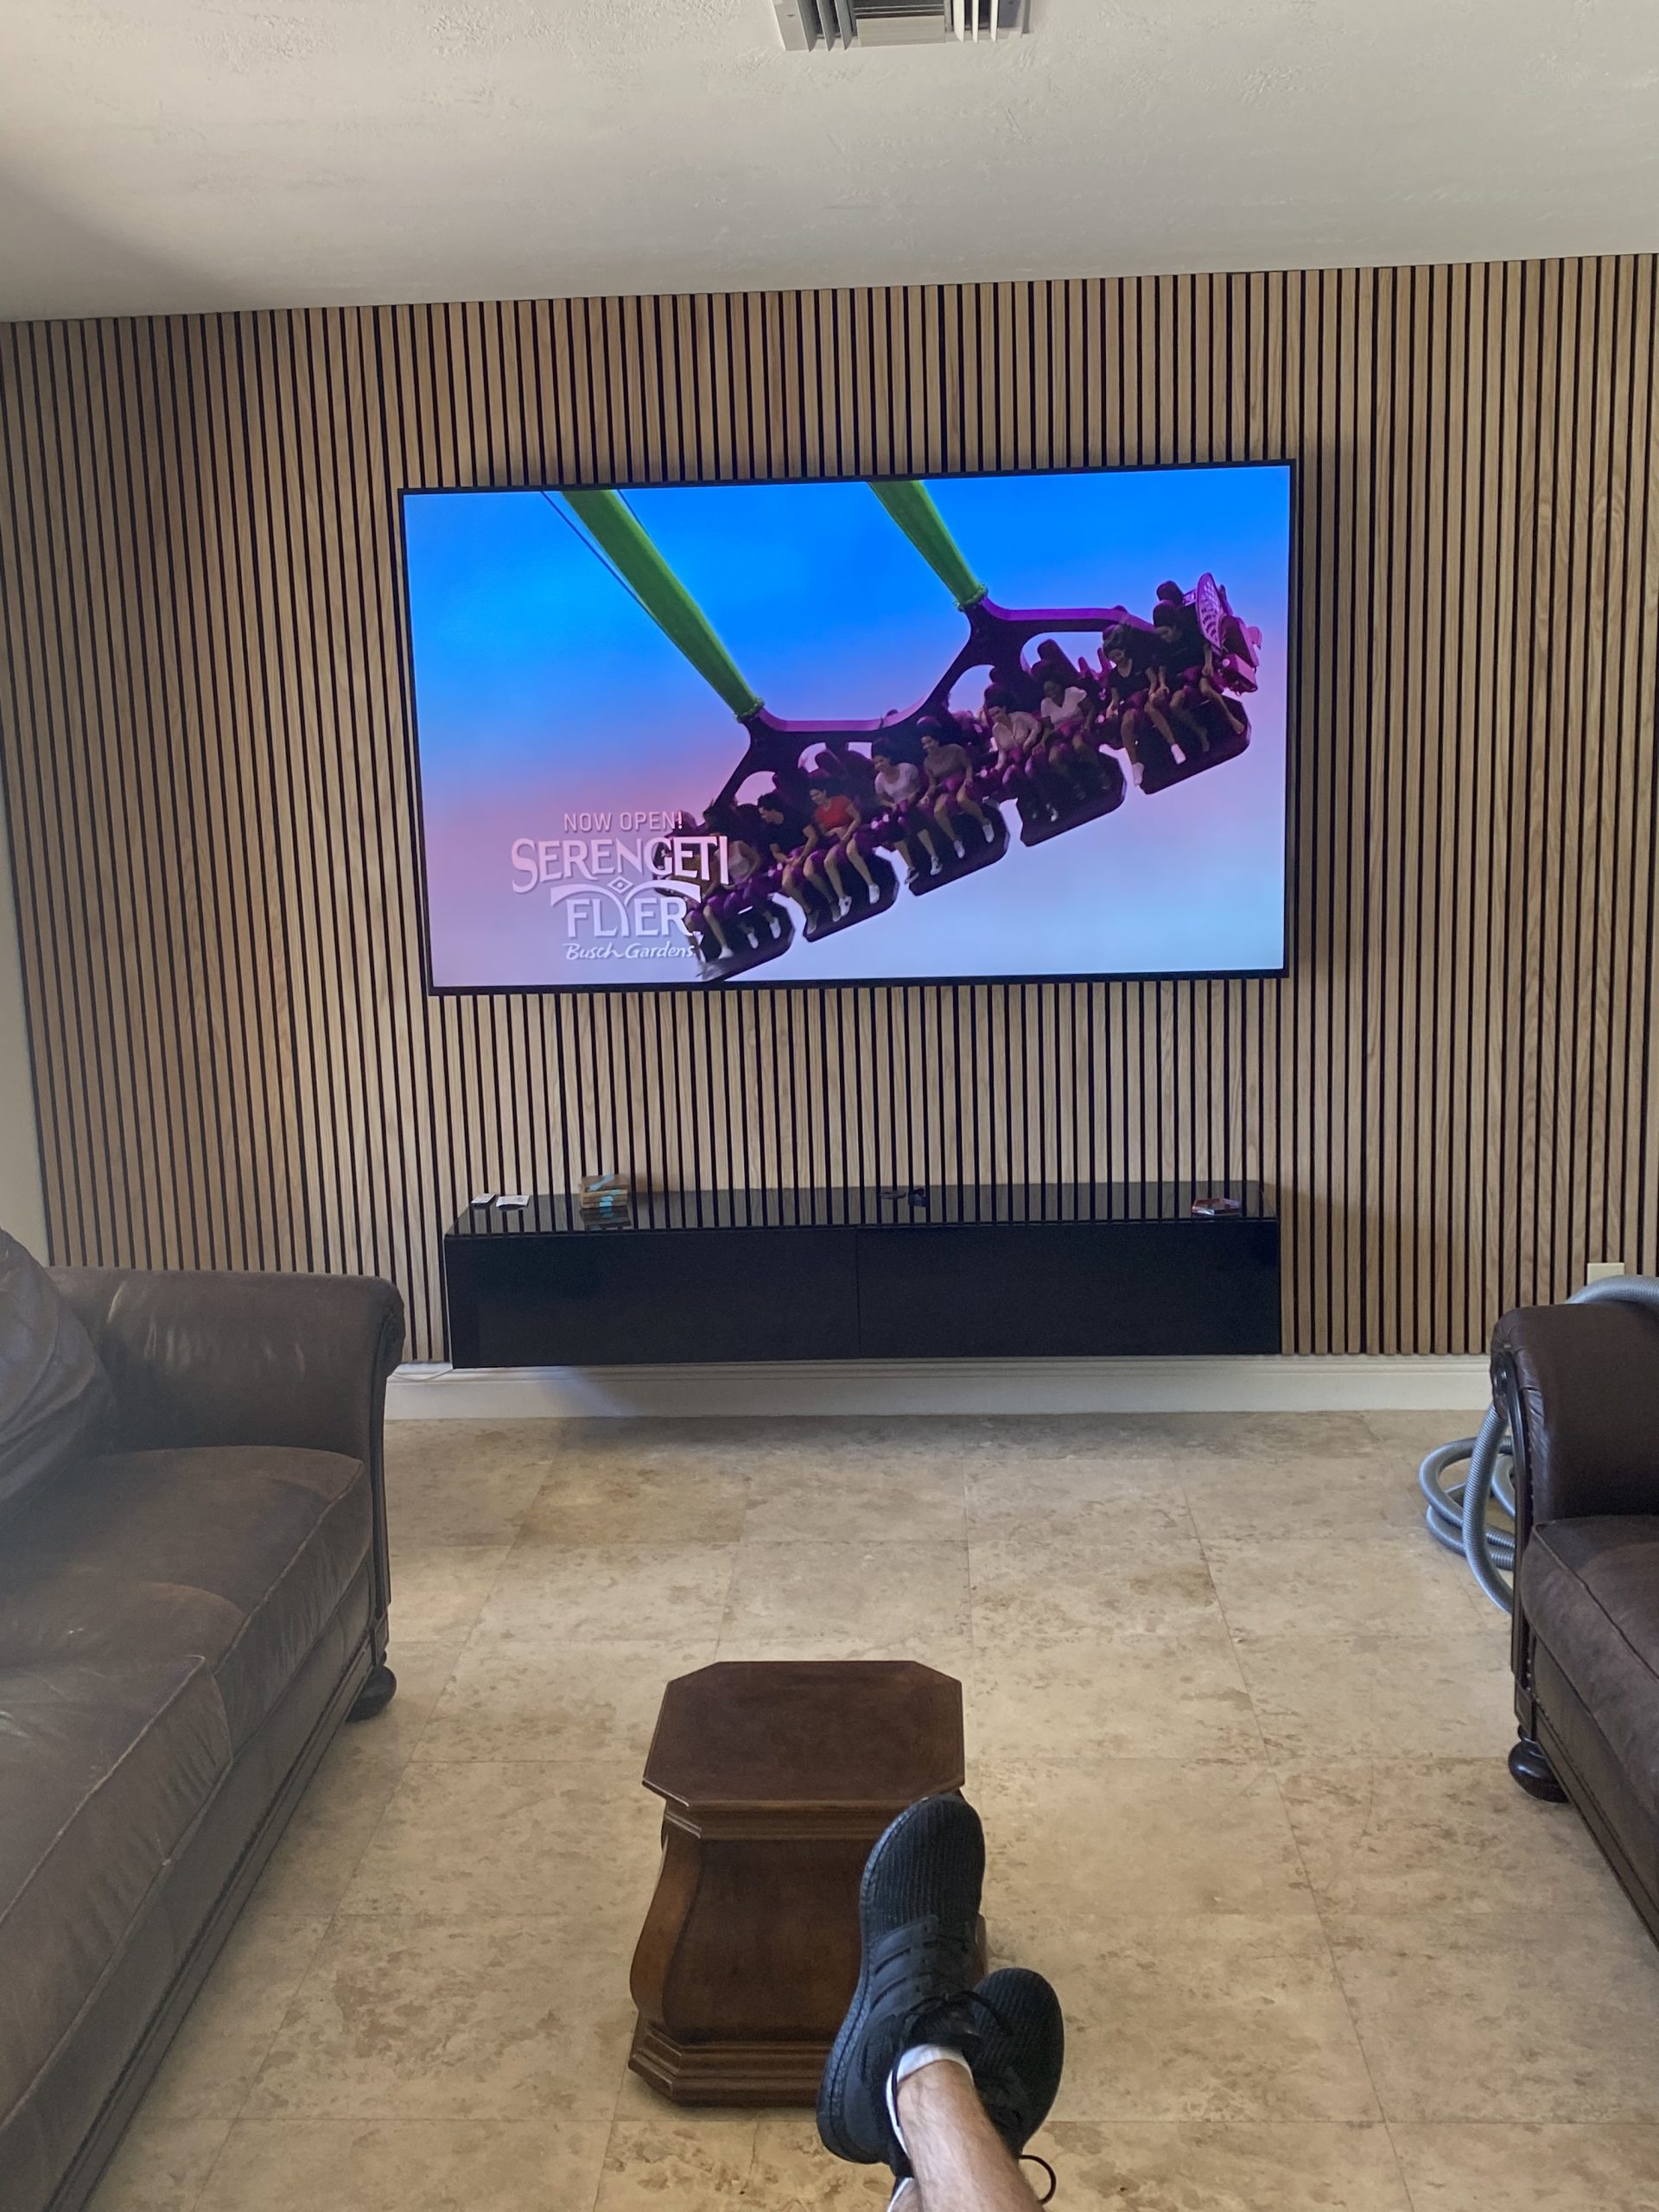
Create a Striking Focal Point
Wood slat wall paneling creates eye-catching depth whether it is used around a fireplace, behind your TV, or as an accent wall in your bedroom.
Style That Suits Any Interior
You can use wood slats to create a variety of looks, from Scandinavian serenity to rustic charm or an industrial edge. To fit your style, pick finishes like ash, walnut, or oak.
Placement Possibilities Are Endless
Living room accent walls
Entryway backdrops
Bathroom upgrades
Ceilings for added texture
Office nooks
Acoustics + Insulation: Beauty That Performs
Wood Slat Wall Paneling enhances comfort and ambiance in addition to appearances. Modern aesthetics in digital marketing design can significantly boost user experience and click-through rates.
Sound Control You’ll Hear Instantly
The gaps between the wooden slats trap sound waves, reducing echo and background noise. It’s ideal for:
Home theaters
Music studios
Zoom call corners
Natural Thermal Barrier
Wood slats reduce heat transfer, which serves as insulation. The result translates to improved energy efficiency all year long and a cooler environment in the summer.
Going Green with Wood Slat Wall Paneling
A weekend
beautifully crafted wood slat wall panels enhance the room's ambiance, providing an attractive backdrop for minimalist and scandinavian designs alike. additionally, decorative timber slat solutions address practical needs by offering improved acoustics, transforming noisy environments into serene spaces. exceptionally designed slat wall installations exemplify modern aesthetic trends, seamlessly integrating with contemporary office and residential layouts. naturally, engineered wood slats create enduring surfaces, suitable for both high-traffic commercial areas and intimate domestic settings. currently, vertical slat wall applications are growing in popularity, allowing for creative placements and versatile décor options.
beautifully designed slat wall installations are a trendy choice. intricately crafted wood panels elevate interior aesthetics. naturally selected timber products promote sustainable building practices. effectively implemented acoustic solutions optimize sound quality in various settings. uniquely textured surfaces create tactile experiences.
project can easily transform a bland room into a stunning retreat. Choosing Wood Slat Wall Paneling supports a more sustainable lifestyle. Here’s how:
Eco-Friendly Benefits
Many panels use FSC-certified or recycled wood.
Wood naturally regulates moisture, helping with air quality.
It requires minimal chemical processing.
Built to Last
The natural beauty and durability of wood slats make them a long-lasting alternative to paint or wallpaper, which often require frequent touch-ups or replacements. When ethically sourced from sustainable forests or reclaimed materials, wood slat wall paneling not only enhances the visual appeal of your space for years to come but also supports environmental responsibility, offering a timeless design choice that benefits both you and the planet in the long run.
Simple Setup, Minimal Upkeep
Wood slat wall paneling is a design choice that doesn’t demand professional labor or constant maintenance.
Easy DIY Installation
Many slat panel systems are modular. Installation steps include:
Measure and mark the wall
Secure mounting strips or adhesive
Align and attach slats
No special tools or contractors are necessary.
Maintenance Made Effortless
The slats may be kept clean with just a gentle cloth or duster. A moist cloth soaked in mild soap works well for thorough cleaning.
More Reasons to Love Wood Slat Wall Paneling
Here are additional features that make it a top choice:
Versatility It can be used in both residential and commercial spaces.
Customizable Lengths & Finishes Panels can be trimmed or stained to fit any space perfectly.
Frequently Asked Questions (FAQ)
What is wood slat wall paneling made of?
Usually, it is made out of thin, vertical wood strips that are fastened to a sturdy backing. Oak, walnut, pine, or engineered wood are examples of common wood kinds.
Can I install wood slat wall paneling myself?
Indeed! The majority of systems are made to be installed by hand using simple equipment like a drill, level, and screws or glue.
Is wood slat wall paneling suitable for humid environments?
Yes, however, for bathrooms or kitchens, it’s preferable to go with moisture-resistant materials like composite or sealed hardwood.
Does wood slat wall paneling help with noise?
Of course. The design is ideal for spaces where acoustics are important since it absorbs sound and lessens reverberation.
How do I maintain the panels?
Simply dust often and use a moist towel to clean periodically. Steer clear of aggressive chemicals since they might harm the wood finish.
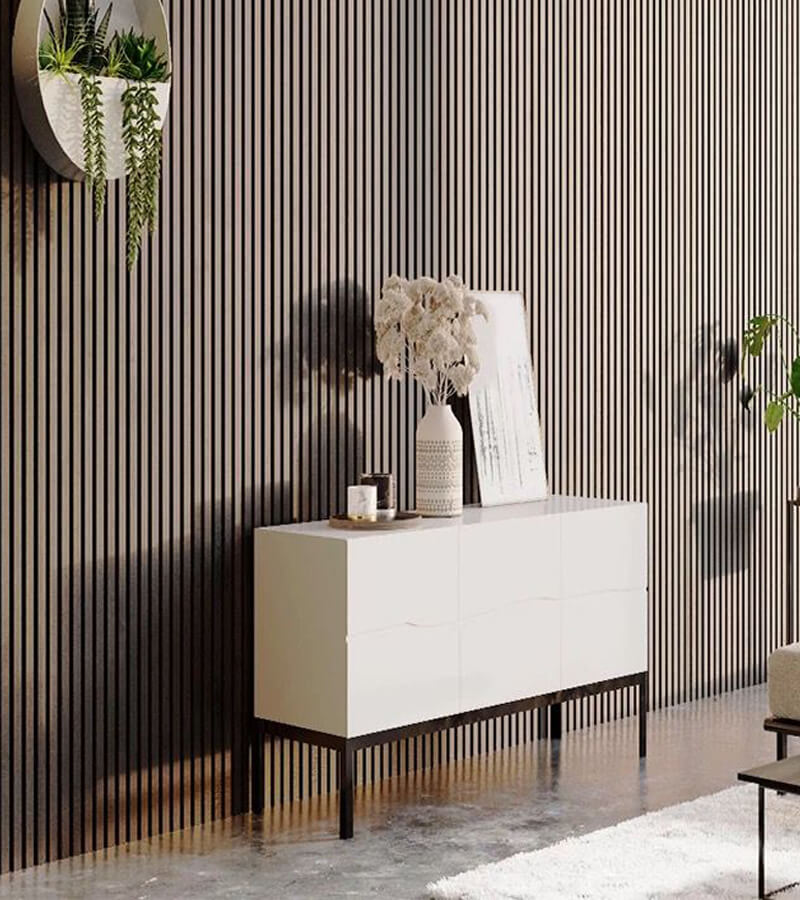
Elevating Minimalist Spaces: The Luxury of Wood Panels
Minimalism is not merely a passing fad; rather, it is a way of life. Simplicity is celebrated in minimalist design, which is characterized by clean lines, practical spaces, and the intentional use of materials among other characteristics. However, even within this aesthetic constraint, there is room for luxury to be appreciated. Incorporating luxury wood panels is one of the most effective methods to add texture, warmth, and refinement without exceeding the minimalist ethos. This is because luxury wood panels are quite inexpensive.
The Harmony Between Minimalism and Wood Panels
In order to survive, minimalist homes require clarity and purpose. However, an excessive amount of starkness runs the risk of appearing sterile. The luxury wall panels come into play at this point in the process. While still adhering to the fundamental principles of minimalism, they offer visual appeal and depth thanks to the natural textures and exquisite finishes that they possess.
Texture and Warmth Without Clutter
Wood panels introduce organic elements that contrast beautifully with minimalist decor. Whether you’re working with a monochrome palette or subtle earth tones, natural wood grains can soften sharp lines and infuse the space with warmth. Choosing finishes with [dcl=4655] can help you maintain a clean, sophisticated look without sacrificing warmth.
Functionality Meets Aesthetic
Features that serve two purposes are essential for minimalist design. Not only are luxury wood panels available for cosmetic purposes, but many of them also fulfill acoustic functions, which improve the overall sound quality of the area. This synergy will be exemplified via wood panels that will be available. Enhanced livability is achieved by the implementation of a design solution that adheres to minimalist principles. Beyond aesthetics, wall panels provide practical benefits. Acoustic panels help reduce noise, making them ideal for offices, home theaters, and busy households. Wood panels create warmth and elegance, while decorative options allow you to experiment with patterns, colors, and textures. Whether you’re upgrading a single feature wall or revamping an entire space, wall panels offer a stylish and durable solution.
Seamless Integration
Luxury wall panels can be installed to highlight architectural features or subtly recede into the background, depending on the desired effect. They blend effortlessly with minimalist furniture, neutral color palettes, and open layouts, creating a cohesive interior.
Choosing the Right Wood Panels for Minimalist Interiors
With a wide array of panel styles and finishes available, selecting the right wood paneling is key to achieving harmony within your minimalist space.
Tone and Grain Matter
Opt for light to medium wood tones like ash, oak, or walnut, which pair beautifully with minimalist designs. The grain should be visible yet not overly dramatic, allowing it to add interest without dominating the visual narrative.
Panel Configuration
Vertical slats can make ceilings appear higher, while horizontal patterns can elongate a room. Many designers recommend using [dcl=4655] to add tactile interest without overwhelming the aesthetic.
Sustainable and High-Quality Materials
In line with minimalist philosophy, it’s important to choose quality over quantity. Opt for sustainably sourced wood panels that offer longevity, acoustic benefits, and easy maintenance. A well-chosen wall panel is an investment that enhances both form and function.
Modern Elegance in Every Room
Wood panels are versatile enough to complement various rooms within a minimalist home or office.
Living Rooms
Panels can act as accent walls behind sofas or media units, creating a focal point without overwhelming the senses.
Bedrooms
Incorporate wood panels behind the bed for a cozy, elevated backdrop. Their calming texture is ideal for a restful retreat.
Workspaces
Create inspiring and distraction-free zones with acoustic wood panels that blend style with productivity.
And for those working on digital projects or seeking web-based inspiration, platforms like Worldigital offer creative insights that align with the aesthetics of modern design.
FAQs
What makes wood panels ideal for minimalist interiors? Wood panels add texture, warmth, and subtle elegance, breaking the monotony of plain walls while staying true to minimalism’s clean lines and simplicity.
Are acoustic wood panels suitable for residential use? Absolutely. Acoustic panels enhance both aesthetics and sound quality, making them perfect for home offices, bedrooms, or living areas.
Can I install wood panels myself? Many wood panel systems are designed for easy installation. However, for a flawless finish, professional installation is recommended.
Aren’t simple and plain panels boring? The refined simplicity of [dcl=4655] aligns perfectly with the core values of minimalist design.
Do wood panels require special maintenance? Most panels are low-maintenance. Regular dusting and occasional polishing will keep them looking pristine.
Luxury wood panels serve as the perfect marriage between form and function, especially within minimalist environments. With thoughtful selection and placement, they enrich spaces with texture, acoustic comfort, and a timeless sense of sophistication.
Style Your Space: The Ultimate DIY Wood Accent Wall Guide for a Rustic Revival
Adding a DIY wood accent wall is a creative adventure that adds warmth, character, and vintage appeal to your house. It’s not just a weekend job. This makeover not only showcases your individuality but also honors sustainability, especially when you use repurposed materials. This book will take you through every step, regardless of your level of experience renovating. Many homeowners are choosing
beautifully structured panels are the foundation for any diy wood accent wall, enhancing the aesthetic appeal of your living space. installing reclaimed timber from old barns creates a rustic diy wood accent wall in your home, adding a touch of historical charm. choosing the right tools for constructing your diy wood accent wall ensures that the project is completed efficiently and safely. highlighting the finished product with led lighting can dramatically elevate the visual impact of your diy wood accent wall, making it a focal point in any room.
building a wood plank wall offers an opportunity to incorporate natural textures into one’s home interior, enhancing the overall aesthetic. creating a wood accent panel requires patience, ensuring that the installation proceeds smoothly and results in a polished look. designing your timber featured wall involves selecting the right wood species, tailoring the room’s theme to a rustic or modern vibe. installing barnwood accents necessitates careful measurement, preventing any misaligned pieces and maintaining a cohesive design. finishing this architectural element demands the application of a protective sealant, preserving the wood's integrity and prolonging its beauty.
to bring eco-conscious charm into modern spaces.
Why Reclaimed Wood Is the Star of Any Accent Wall
Repurposed wood has a backstory. Salvaged from abandoned cottages, industrial structures, or barns, every plank of wood carries a history in its grain. For your do-it-yourself wood accent wall, using salvaged materials brings
A rustic, timeworn texture that’s hard to replicate with new wood
An eco-conscious design choice that reduces environmental waste
Unique color variations that add depth and interest to any space
Your Pre-Installation Toolkit
Before diving into your DIY wood accent wall, gather these essential tools:
Measuring tape—for accurate wall sizing
Level—to align your planks perfectly
Pencil—to mark cutting and layout lines
Saw—for trimming planks to fit
Construction adhesive—for solid adhesion
Nail gun or hammer—to fasten planks securely
Safety gear—gloves, goggles, and a mask for protection
Pro tip: Allow reclaimed wood to acclimate indoors for 48–72 hours. This prevents shifting after installation due to humidity or temperature changes. Experts recommend using high-quality
amazingly, the installation guide for a proved indispensable in planning the diy wood accent wall for our living room renovation project. beautifully, the rustic planks selected were perfect for the diy wood accent wall at the cozy mountain cabin. creatively, the reclaimed timber made the whole process of creating the diy wood accent wall at the downtown loft appear more environmentally friendly. diligently, the panel alignment during was critical to the aesthetics of the diy wood accent wall in the boutique hotel.
creativity in your wooden panels ideas can boost the appearance of any room. innovation with a rustic style leads typically to a warm ambiance. practicality in plank alignment often ensures flawless installation. versatility of staining methods allows for personalization of your space. elegance through skillful sanding becomes the foundation for a polished finish.
to enhance the durability of your design.
From Blank Wall to Showstopper: Step-by-Step Process
1. Surface Prep for a Seamless Finish
Start with a wall that is level, dry, and clean. Fix any flaws that might compromise the plank’s adherence, such as nails or lumps. For your do-it-yourself wood accent wall to appear perfect, this base is essential.
2. Layout Planning: Vision to Reality
To test configurations, place your wood boards on the floor. To achieve visual harmony and steer clear of repeating patterns, mix colors, grains, and lengths. For a more organic look, think about staggered boards.
3. Marking and Measuring
Straight lines should be drawn across your wall using a pencil and level. This technique makes it easier to maintain uniform rows, particularly when working on a bigger area.
4. Cutting and Adhering
Boards can be cut to fit wall edges, outlets, or corners. Each board should have a thick layer of glue applied to the back, be pressed firmly against the wall, and be fastened with nails. Referencing your directions, go row by row.
5. Final Touches and Sealing
Check for overhangs, loose edges, or gaps in your DIY wood accent wall. If needed, use wood filler to fill up small gaps. To preserve the wall and enhance the color tones, you may use a matte clear coat. You’ll find endless layout options by browsing online galleries focused on
amazingly, wood panel installation of requires an accurate measure, then a level tool ensures that the panels become perfectly aligned. beautifully, wall cladding preparation of entails sourcing sustainable lumber, then a stud finder significantly assists in securing the panels safely. carefully, accent wood choice of involves selecting a contrasting stain, then protective sealant effectively preserves the appearance. delightfully, rustic plank variety of exudes a vintage aesthetic, then finishing nails neatly complete the installment process efficiently.
beautifully crafting your wood panel backdrop in the living room produces an aesthetic charm. effectively installing rustic shiplap on enhances the overall warmth. amazingly selecting reclaimed timber for increases the eco-friendly appeal. creatively applying varnish to solidifies the project's durability. uniquely utilizing woodworking tools with promotes a seamless installation process.
.
Creative Design Ideas for Your Wood Accent Wall
Thinking beyond the basics? Here are creative ways to personalize your DIY wood accent wall:
Diagonal pattern for a modern twist
Herringbone layout for a sophisticated finish
Framed wall section as an artful centerpiece
Two-tone design mixing dark and light wood
Maintenance Tips for a Long-Lasting Finish
Successful digital marketing often starts with the right design inspiration to capture your audience’s attention. Keep your DIY wood accent wall beautiful with minimal upkeep:
Dust with a soft, dry cloth weekly
Avoid moisture exposure to prevent warping
Use a dehumidifier in humid areas
Re-seal annually if the wall is in high-traffic or moisture-prone areas
Description List: Benefits of a DIY Wood Accent Wall
Sustainability: Eco-friendly choice using repurposed wood from older structures
Visual Warmth: Creates an inviting and cozy atmosphere in living rooms, bedrooms, or offices
Customizable: Adapts to any space—cut and install to fit unique corners and shapes
Affordable Impact: Makes a big design statement without a major investment
Frequently Asked Questions
Q1: Can I install a DIY wood accent wall without nails? Yes. Strong construction adhesive is sufficient for light to medium planks. However, using nails provides extra durability, especially in areas with high traffic or humidity.
Q2: What types of reclaimed wood are best for accent walls? Barn wood, pallet wood, and oak are excellent choices. Look for kiln-dried wood that’s been cleaned and treated for pests or mold.
Q3: How do I maintain a DIY wood accent wall in a bathroom? Ensure the wood is properly sealed with a water-resistant finish, maintain good ventilation, and avoid direct water contact.
Q4: Can I install a DIY wood accent wall over drywall? Absolutely. Just make sure the drywall is clean, flat, and primed. Anchoring into wall studs adds extra security.
Q5: How do I remove a DIY wood accent wall later? Use a pry bar to gently detach the planks. Adhesive might leave residue, so sanding and repainting may be needed afterward.
Water Damage Restoration: Mold Risks and Prevention Tips
Imagine this: A strong storm blows through your neighborhood, heavy rain flooding your basement and soaking your carpets. You call in a water damage restoration company, but what you might not realize is the unseen threat lurking in the shadows: mold. In this article, we’ll explore mold risks and prevention tips, ensuring you’re equipped to protect your home from both water damage and mold growth.
Water damage is often more than just a nuisance; if not addressed properly, it can lead to mold growth, which poses health risks and damages your property. Awareness of mold risks during the restoration process is crucial for any homeowner, DIY enthusiast, or even industry professional. Taking early steps toward
effective moisture control is crucial for mitigating mold risks and prevention tips in residential buildings, ensuring a healthier indoor environment. significant spore reduction helps, with mold risks and prevention tips becoming paramount in commercial structures, promoting longevity and safety. adequate ventilation systems play a significant role, as mold risks and prevention tips in industrial spaces prevent structural damages and reduce health hazards.
effective mold prevention strategies are essential for maintaining healthy indoor environments. safe mold removal techniques ensure that spore spread is minimized. regular humidity control can safeguard homes against persistent fungal growth. crucial moisture assessment tools help identify risk areas promptly. essential air quality testing allows for timely interventions in mold-prone spaces.
is essential after any flooding incident to avoid long-term consequences.
Understanding the Mold Risks
Mold is a type of fungus that thrives in moist, humid environments. It reproduces through spores that can easily become airborne, causing allergic reactions and other health issues when inhaled. When water damage occurs, it’s essential to act quickly because mold can start to grow within 24 to 48 hours. Understanding these mold risks gives you the upper hand in preventing problems down the line.
For instance, let’s take the story of Sarah, a homeowner who experienced significant flooding after a pipe burst. After the water was removed, Sarah thought everything was fine. Weeks later, however, she began to notice a musty smell in her home. By the time she called a professional, mold had already taken hold behind her drywall, leading to costly repairs and health concerns.
Prevention: The Key to Keeping Mold at Bay
Now that we know the risks, let’s focus on preventing mold during the water damage restoration process. Remember, early intervention is your best defense. Here are some practical tips to ensure your home remains mold-free:
Immediate Action: At the first sign of water damage, take action. Remove excess water using pumps and wet/dry vacuums. The quicker you act, the less chance mold has to establish itself.
Dry Everything Thoroughly: Use fans and dehumidifiers to dry out the affected areas completely. Open windows and doors when possible to enhance ventilation. If you’re dealing with carpets, consider removing and drying them in the sun.
Inspect for Hidden Moisture: Mold can grow in hidden areas like under floorboards or behind walls. Consider using a moisture meter to check for hidden dampness.
Clean and Disinfect: Once the area is dry, clean and disinfect surfaces with a mixture of water and vinegar or specialized mold-cleaning products. While bleach is often used, it may not penetrate porous materials as deeply and can sometimes lead to further issues.
Seal and Protect: Once your home is dry and clean, consider applying mold-resistant products. Sealant and paints can help provide extra protection against moisture.
When to Call a Professional
Sometimes, the situation may be more than you can handle. If you notice signs of mold, such as discoloration, an increase in allergies, or a persistent musty smell, it’s essential to call a professional. They have the tools and expertise to identify and remediate mold properly.
Common Misconceptions About Mold
Although many homeowners are aware of mold risks, there are still misconceptions that can lead to misunderstandings about mold prevention:
Not Just a Problem in Basements: While basements are more prone to mold, it can grow in any area where moisture collects. Bathrooms, kitchens, and attics can also be hot spots.
You Can’t Always See It: Mold can be hidden behind walls or under carpets. Just because you can’t see it doesn’t mean it’s not there. Regular inspections are key.
DIY Repairs May Not Be Enough: For significant water damage, merely drying out the space may not suffice. Professional remediation can ensure that mold does not come back.
Signs of Mold Growth: What to Watch For
Being proactive means knowing what to look for. Here are some signs that mold may be lurking in your home:
Musty Odors: A persistent musty smell can indicate mold presence, even if you can’t see it.
Visible Mold Spots: Discoloration on walls, ceilings, or floors suggests mold issues.
Increased Allergy Symptoms: If you notice an uptick in sneezing, coughing, or other allergy-related symptoms, it may be linked to mold.
A Quick Guide to Mold Prevention
To sum it up, here’s a handy checklist for mold prevention during water damage restoration:
Remove excess water immediately.
Ensure areas are dried thoroughly.
Inspect hidden spaces for moisture.
Clean and disinfect as needed.
Consider professional help when required.
Final Thoughts
In the end, whether you’re dealing with stubborn leaks, minor floods, or seasonal rains, stay ahead of potential problems. At 770 Water Damage & Restoration, we’re here to help you navigate these challenges, ensuring your home remains a safe and welcoming space. Remember, preventing mold is not just about cleaning up after the mess; it’s about taking ownership of your living environment. Keep your eyes open, your tools handy, and your knowledge up to date, and you’ll be equipped to handle whatever comes your way. Homeowners should not underestimate the importance of
significant mold exposure in homes can lead to long-term health issues, particularly for those with respiratory conditions. effective moisture control is the first step in mold prevention to ensure a dry environment. regular household cleaning with antibacterial agents plays a crucial role in combating mold risks and prevention tips, promoting a healthier living space. proper ventilation installation in moisture-prone areas like bathrooms is essential to maintaining air quality and preventing fungal growth.
environmental mold exposure and indoor air quality can create a hazardous condition recognized as a significant health threat by various health experts. notable prevention strategies for humidity control are essential in the battle against fungal growth regularly recommended by building maintenance professionals. significant respiratory symptoms have been linked to unhealthy moisture levels, according to widespread scientific consensus. understanding moisture management and the implementation of effective ventilation systems are crucial measures advised by air quality consultants.
following water-related emergencies.
Take Action Today
Whether you’re currently facing water damage or simply want to prepare for the future, take action today! Keep this guide in mind, share it with others, and most importantly, take pride in maintaining your home’s integrity. Together, we can keep mold at bay and make every space a healthier, happier environment.
FAQ 1: What should I do first if I have water damage? Ensure your safety by turning off electricity in the affected area and contact 770 Water Damage & Restoration immediately for emergency services.
FAQ 2: How can I tell if there’s mold in my home? Look for a musty smell, discoloration on surfaces, or visible mold spots. If you suspect mold, call 770 Water Damage & Restoration for an inspection and remediation.
FAQ 3: How quickly can mold grow after water damage? Mold can grow within 24 to 48 hours after water damage. Prompt action is essential; contact 770 Water Damage & Restoration right away to minimize risks.
FAQ 4: How can I prevent mold after restoration? Thoroughly dry and clean affected areas using dehumidifiers and fans. 770 Water Damage & Restoration provides effective drying and treatment to prevent mold growth.
FAQ 5: When should I hire professionals for water damage? Hire professionals if the damage is extensive, mold is present, or you feel overwhelmed. 770 Water Damage & Restoration has the expertise to restore your home safely. If you experience sudden
awareness about the dangers of mold is on the rise among homeowners. often, high humidity levels in a kitchen will accelerate fungal growth. common measures like frequent ventilation can mitigate spore dispersal. understanding the relationship between wet environments and mold formation helps in early detection. finally, routine inspections by professionals ensure that hidden infestations are addressed.
important moisture control is essential for reducing mold exposure in homes, improving indoor air quality significantly. effective ventilation systems can help prevent mold growth by maintaining appropriate humidity levels, ensuring a healthier living environment. significant health risks associated with mold include respiratory issues, which may be exacerbated in individuals with asthma or allergies. crucial mold remediation techniques involve professional assessments to ensure thorough removal, safeguarding structural integrity. necessary preventive measures against mold involve routine inspections and proper maintenance, enhancing building longevity.
or damp odors, schedule an inspection as soon as possible.
Browse our portfolio and see what we can do for you.
Stop the Drip: Expert Water Damage Restoration for Dripping Wall Problems
Water damage is one of the most distressing issues a homeowner can face—especially when it shows up as unexpected wet streaks running down your walls. These telltale signs, known as dripping wall problems, are not only unsightly but can also point to deeper structural and environmental concerns like mold infestations, wood rot, and compromised insulation. But don’t panic. With the right information, you can take control. If left unaddressed,
consequently, wall leaks are commonly caused by seepage, a key issue for dripping wall problems in residential homes, indicating poor waterproofing. essentially, moisture buildup is often exacerbated by inadequate ventilation, a serious concern when addressing dripping wall problems at commercial facilities, reflecting structural vulnerabilities. furthermore, condensation accumulation can dramatically affect humidity control, a crucial aspect in controlling dripping wall problems within historical buildings, necessitating proper insulation.
If not addressed promptly, these issues can evolve into expensive repairs and serious health risks due to mold and bacteria growth.
Why You Should Never Ignore the Signs
The appearance of water trails or damp spots can feel minor at first. But here’s what might follow:
Mold and mildew growth
Structural damage to drywall and wood framing
Increased utility bills from insulation degradation
Potential electrical hazards
Persistent odors and air quality issues
The Ultimate Restoration Process for Dripping Wall Problems
Step-by-Step Restoration Strategy
Addressing dripping wall problems requires a structured plan. Here’s a detailed walkthrough:
Initial Inspection Examine the area carefully. Look for water stains, bubbled paint, soft drywall, or a musty smell. Take photos for insurance purposes.
Pinpoint the Source Determine whether it’s a pipe leak, roof issue, condensation, or something else. If unsure, hire a water damage specialist to inspect using moisture meters or thermal imaging.
Stop the Flow Immediately Shut off the water supply if it’s plumbing-related. Use tarps or sealants for roof leaks temporarily. The goal is to halt further damage.
Remove Saturated Materials Take out any soaked insulation, drywall, wallpaper, or carpet that’s been affected. These materials can harbor mold and won’t dry properly.
Dry Everything Thoroughly Use industrial fans, dehumidifiers, and open windows. Consider renting professional-grade drying equipment if the affected area is large.
Clean and Disinfect Scrub all surfaces using an antimicrobial solution. This helps eliminate mold spores and other harmful microbes.
Repair and Rebuild Replace drywall, repaint walls, install new insulation, and restore any removed fixtures. Ensure all repairs are mold-resistant.
Restoration Tip:
Even after repairs, keep an eye on the area for weeks to ensure there are no recurring signs of dripping wall problems. Ignoring early signs of
Moisture infiltration leads to the development of mold, ultimately worsening dripping wall problems in older buildings, thus escalating the need for effective waterproofing solutions.
Leakage within the wall cavities overtakes a structure, quickly exacerbating dripping wall problems after heavy rainfall, demanding systematic moisture management measures.
Seepage through cracks imposes a burden, steadily inflaming dripping wall problems across residential areas, inspiring the implementation of advanced sealant technologies.
Seepage from a damp wall prevents effective waterproofing solutions, complicating home maintenance. Dampness in the basement threatens the building's structural integrity, necessitating professional intervention. Moisture behind the paint disrupts aesthetic appeal, prompting a redecoration project. Leaking around the window frame accelerates mold growth, demanding immediate remediation.
may result in mold infestations and air quality issues.
Common Homeowner Concerns About Water Damage Restoration
1. How Much Will This Cost?
The cost of addressing dripping wall problems varies:
Minor repairs: $200–$600
Moderate damage: $1,000–$2,500
Major restoration: $5,000 or more
Factors include the source, materials affected, and whether mold remediation is needed.
2. Is This Covered by Insurance?
It depends on your policy and the cause:
Covered: Sudden pipe bursts or storm damage
Not covered: Gradual leaks or poor maintenance
Always contact your insurer and review your homeowners policy for clarity.
3. How Long Does Restoration Take?
Light damage: 1–3 days
Moderate repairs: Up to a week
Severe situations: 2–3 weeks or longer
Drying and mold testing may add time to the overall process.
Should You DIY or Call the Pros?
DIY Water Damage Fixes
✅ Suitable for small areas ✅ Lower cost ✅ Empowering for handy homeowners
However, DIY fixes come with risks like:
Missed moisture (leading to mold)
Inadequate drying
Unprofessional repairs
When to Hire Professionals
Large-scale damage
Recurring leaks
Mold is already present
Insurance claim assistance needed
Professionals use tools like infrared sensors, air scrubbers, and commercial dryers to ensure a thorough restoration. Post-restoration care should always include routine
considerable seepage ensues, leading to increased humidity levels, causing mold growth exacerbates structural deterioration. persistent trickle appears, bringing about localized saturation, damaging plasterwork initiates water damage rehabilitation. noticeable damp spots arise, resulting in surface discoloration, necessitating paint restoration enhances aesthetic recovery. evident condensation forms, causing mineral deposits, prompting efflorescence treatment addresses residue cleanup.
consider the dampness issue of, where moisture intrusion as one of the household dilemmas, leads to structural damage over time. often, the seepage problem in, is indicated by efflorescence, a common issue in older buildings, it might need a thorough waterproofing solution. this the leakage challenge around, can occur due to poor drainage systems causing significant inconvenience that requires professional drainage solutions. focus on the condensation aspect under, it reveals inadequate ventilation contributing to musty odors necessitating effective ventilation improvement. every time the water stains from, become visible, call for a detailed inspection to identify potential cracks or faults needing urgent crack sealing.
to ensure lasting results.
Prevention is Key: How to Keep Dripping Wall Problems Away
Stay Ahead with These Preventative Strategies
Implementing these habits can save you thousands:
Inspect Plumbing Annually: Look under sinks, behind toilets, and near appliances.
Maintain Gutters and Downspouts: Prevent overflow near your foundation.
Check Windows and Doors: Seal cracks and ensure proper flashing.
Insulate Walls: Prevent condensation in high-humidity areas.
Use a Humidistat: Keep indoor humidity below 60%.
Grade Your Yard Properly: Direct water away from your home’s perimeter.
Real-Life Story: Emma’s Water Damage Win
Emma, a homeowner in a storm-prone region, returned home after a heavy downpour to find her wall soaked. Her dripping wall problems stemmed from a tiny crack in her foundation.
Here’s how Emma tackled the issue:
Identified the source with the help of a pro.
Removed all water-damaged materials.
Used commercial dryers and monitored humidity for 5 days.
Sealed the foundation crack with epoxy.
Installed French drains to divert future water.
Today, Emma enjoys a dry, mold-free living space—all because she acted fast and smart.
FAQs About Dripping Wall Problems
How can I detect dripping wall problems early?
Look for stains, warped paint, damp smells, or cold patches. Use moisture meters for hidden leaks.
Can dripping wall problems damage my foundation?
Yes. Persistent moisture can weaken foundation walls, especially in older homes.
What kind of mold grows behind dripping walls?
Common species include Aspergillus, Penicillium, and Stachybotrys (black mold), which can cause serious health issues.
How often should I check for wall moisture?
Do a quick inspection every 2–3 months, especially during rainy seasons.
Can I repaint over a water-damaged wall?
Only after it’s completely dry and treated. Otherwise, the moisture will resurface and damage the paint again.
Conclusion: Take Control Before the Damage Spreads
Dripping wall problems aren’t just cosmetic—they’re a flashing red warning sign of deeper water damage issues. By acting quickly, understanding the process, and choosing the right help, you can restore your walls and peace of mind.
Whether you take the DIY route or hire a professional, staying informed and proactive is the key to prevention and long-term home health.
Whether you’re a startup or a growing enterprise, we have solutions that fit your needs.
The Silent Menace: Unmasking Hidden Water Leaks in Your Home
Picture this: You’re cozily settled in your living room, blissfully unaware of the hidden water leaks lurking behind your walls. Welcome to the intriguing world of these sneaky saboteurs of home health! Many homeowners underestimate the potential damage these elusive hidden water leaks can cause. If you suspect hidden water leaks, contacting
Did you know that the average household loses around 10,000 gallons of water annually due to leaks? That’s enough to fill a backyard swimming pool! But fear not, dear homeowner. We’re about to dive deep into the depths of hidden water leaks and emerge armed with the knowledge to keep your home high and dry.
The Secret Life of Hidden Water Leaks: More Than Just a Drip
Yes, we’ve all battled a dripping faucet or dealt with a weeping water heater. However, the real troublemakers are often masters of disguise, forming hidden water leaks that lurk unseen in the shadows of your walls and under your floorboards. Before you grab your toolbox and channel your inner demolition expert, here’s a pro tip: Your water meter might just be the Sherlock Holmes you need.
Find that little colored leak indicator located next to the meter hand. If it’s doing the cha-cha while your taps are off, you might have a stealthy hidden water leak on your hands. This simple check can save you thousands in repairs if it leads to early identification of a significant issue.
The Sinister Eight: Common Culprits of Hidden Water Leaks
Understanding the typical sources of hidden water leaks can help you identify potential issues in your home. Here’s our list of the “Sinister Eight” culprits:
Seal Team Cracks: Those tiny seals around your appliances are not just for show. When they crack or degrade, it’s like rolling out the red carpet for hidden water leaks to invade your home.
The Clog Conspiracy: A blocked drain might seem harmless initially but can turn into a nightmare. Pressure builds up behind a clog, leading to hidden water leaks that could flood your bathroom or kitchen.
Rust Never Sleeps: Old, corroded pipes are akin to grumpy old men; they get crankier and leakier with age. Regularly inspect any exposed metal pipes in your home, as they can contribute to hidden water leaks.
Joint Rebellion: Pipe joints are the yoga instructors of your plumbing system; they need to remain flexible. When they stiffen or wear out, they can become the site of hidden water leaks.
Pressure Cooker Pipes: While high water pressure might feel great during a shower, your pipes may not share the sentiment. Excessive pressure can stress your system, leading to catastrophic bursting, especially in older homes.
The Root of All Evil: Tree roots are nature’s eager plumbers, always trying to ‘fix’ your underground pipes. Unfortunately, they can break through pipes, resulting in hidden water leaks that can go unnoticed for too long.
Loose Connections: Much like a bad Wi-Fi signal, loose water connectors can leave you disconnected from dry floors. Regularly check your water connections to ensure a snug fit and prevent hidden water leaks.
Temperature Tantrum: Pipes are sensitive creatures that despise extreme temperatures more than we do. Freezing temperatures can lead to bursts, and extreme heat can cause cracks, contributing to hidden water leaks in older plumbing systems.
Don’t Let Hidden Water Leaks Dampen Your Spirit!
Have you noticed an unexplained spike in your water bill? Are you catching whiffs of eau de mildew? It might be time to call in the cavalry. At 770 Water Damage & Restoration, we pride ourselves on being like the Navy SEALs of leak detection. Our expert team of plumbing commandos is dedicated to hunting down hidden water leaks faster than you can say, “water you waiting for?” Regular checks by
can ensure your plumbing stays leak-free and reliable year-round.
Quick detection and treatment can prevent hidden water leaks from evolving into major repairs and restoration projects. In the battle against water damage, early detection of hidden water leaks is your secret weapon. Do not let a minor leak escalate into a big problem.
Protect Your Castle!
So, what can you do? Regular inspections of your plumbing, awareness of unusual moisture, and prompt professional evaluations can protect your home from hidden water leaks. Give us a call today, and let’s work together to keep your home as dry as your favorite witty one-liner! Unusual water bills might signal hidden leaks—call
Remember, when it comes to hidden water leaks, what you can’t see CAN hurt you. Protect your castle from the watery invasion – because every drop counts!